How Do I Use a Plasma Cutter? – [Complete Beginner’s Guide]
When you first get into metalworking, it can be pretty overwhelming, especially considering there are principles and practices to learn.
In particular, if you're looking to start on plasma cutting, understand there has to be a learning curve, and you need to master using the machine along with several other tools.
Fortunately, with a little practice and patience, it’s easier to learn how to use a plasma cutter.
In the text below, we shall explore how to use a plasma cutter. Our goals are to help you become a better metalworker, and through sharing our metalworking experiences, you should have a solid working knowledge by the time you through with the article.
But before we look at how to use a plasma cutter, let’s have a recap of what plasma cutting is.
Table of Contents
What is Plasma Cutting?
Plasma cutting is one way or another similar to TIG welding; plasma cutters, however, use a stream of high-velocity ionized gas that is passed through a constricted orifice.
The ionized gas, also known as plasma, is then introduced to an electrode, thus conducting electricity to the workpiece.
Components for Plasma Cutting
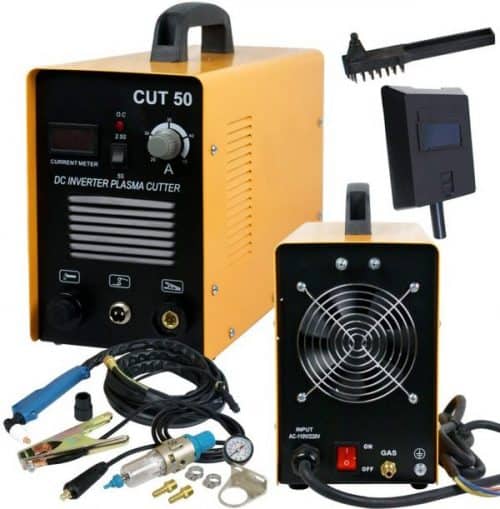
To understand how to use a plasma cutter, we need to know the various components of the cutter and the role they play in the overall cutting performance.

Power Hook Up
Your plasma cutter needs an output plug for power hooks up.
Most of the cutters work on either a 110V or 220v, though some of them have dual-voltage outputs.
Air Compressor
Unless your plasma cutter has an inbuilt air compressor, you'll require an external compressor.
An air compressor is responsible for providing continuous air pressure for making cuts.
Moisture Filter
A moisture filter is responsible for ensuring that only dry air is sent from the plasma to the compressor.
It goes a long way at increasing the shelf-life of your plasma cutter, and we recommend having it.
Grinder/Wire Wheel
Before cutting or welding, it’s necessary that you clean your workpiece.
See, paint and other impurities can severely affect the quality of your weld, and having a grinder to remove these impurities will increase the visibility and quality of your cut.
How to Cut with a Plasma Cutter?
Now that you have an idea of what plasma cutting and the essentials you need, let's look at the step by step method of cutting with a plasma cutter.
Read the Manual
First things first, you need to take the time to read the owner's manual; you need to familiarize yourself with your particular model and its operation.
Safety
It goes without saying that welding is a dangerous endeavor, and you need to protect yourself from the safety welding hazards adequately.
Step 1: Clean the Working Area
Before setting up a plasma cutter, ensure the working space is clean and free of any debris.
If there is presence of dust or any debris, the cooling fans might such these particles, which can lead to serious damage to the unit.
Step 2: Create a Stable Workspace
The next step is to set up a stable working surface.
Unstable surfaces are risky, and you need to work on a surface that is strong enough to cut on.
You can even bolster the stability and safety of the working area by using a metal clamp to hold the piece down.
Step 3: Plug in the Plasma Cutter
This is quite self-explanatory as you simply need to ensure the device power is off before plugging it in.
Step 4: Connecting the Air Compressor
Connect the air compressor if your unit doesn’t have a build-in type.
Step 5: Turn on the Air Compressor
The next step after connecting the air compressor is to turn ON the electrical outlet.
Step 6: Attach the Ground Clamp
The ground clamp is an essential part of the plasma cutting process as it helps to stabilize and secure the workpiece.
More importantly, remember that plasma cutting usually involves an electrical charge that melts the metal, and so, by attaching the ground clamp, you can help to bolster your safety.
Step 7: Turn on the machine
Typically, most of the plasma cutters have the ON/OFF switch at their rear end, and to turn this unit; you simply need to flip the switch to an ON position.
Step 8: Setting the Amperage
Before cutting, you need to set the amperage control.
Ideally, we suggest that you test the amperage on a small section of your workpiece to determine the exact amperage you’ll require for your task.
Step 9: Cut the Metal
When cutting, it’s recommendable that you always keep the nozzle on the edge of the base metal before pushing the trigger to start the arc.
Slowly move the torch over the metal, until you achieve your desired weld.
Step 10: Switch Off the Machine
When you're done with the process, switch off the machine, and don't forget to disconnect the clamp from the metal.
- Read more: Amico ARC-160D Stick Welder Review
Conclusion
What we’ve just shared with you is a basic guide on the essential pointers to look out for when using a plasma welder.
The specifics might vary among the various plasma models as well as the type of material, but at least, you have the rudimentary basics on how to do it.

![How Do I Use a Plasma Cutter? – [Complete Beginner’s Guide] How Do I Use a Plasma Cutter](https://powertoolsgeek.com/wp-content/uploads/2019/12/How-Do-I-Use-a-Plasma-Cutter.jpg)